Every car lover dreams of that flawless, glossy finish and spotless cabin. Here is the shocker—over 80 percent of professional detailers rely on microfiber towels to avoid scratches and achieve a perfect shine. Most people think detailing is just an expensive car wash, but the real secret is the careful prep and specialized tools that make your car look—and feel—brand new.
Table of Contents
- Step 1: Gather Essential Supplies And Tools
- Step 2: Prepare Your Vehicle’s Interior And Exterior
- Step 3: Clean And Condition All Surfaces
- Step 4: Polish And Protect Paint With Quality Products
- Step 5: Final Inspection And Quality Check
Quick Summary
| Key Point | Explanation |
|---|---|
| 1. Invest in quality detailing tools | Durable supplies like microfiber towels and various brushes prevent damage and ensure effective cleaning. |
| 2. Control lighting and temperature | Preparing in a shaded, well-lit area helps avoid streaks and enhances detail quality. |
| 3. Use surface-specific cleaning agents | Different materials require tailored cleaners to maintain their condition and appearance effectively. |
| 4. Follow a systematic cleaning process | Cleaning from top to bottom and using a two-bucket method minimizes dirt re-deposition during washing. |
| 5. Conduct a thorough final inspection | Evaluate surfaces closely in good lighting to catch imperfections and ensure quality detail. |
Step 1: Gather Essential Supplies and Tools
Successful car detailing starts with having the right equipment and supplies at your fingertips. Professional tuners and automotive enthusiasts understand that preparation is the foundation of exceptional vehicle maintenance. Before diving into the detailing process, you’ll need to assemble a comprehensive toolkit that ensures thorough and efficient cleaning.
Professional Detailing Equipment Essentials
The core of your car detailing arsenal begins with high-quality cleaning tools that enable precision and professional results. Start by investing in microfiber towels, which are critical for preventing scratches and achieving a streak-free finish. These versatile cloths work across multiple surfaces and absorb dirt and moisture more effectively than traditional rags. Select microfiber towels with different pile heights – shorter naps for glass and smoother surfaces, longer naps for more aggressive cleaning and absorption.
Your toolkit should include specialized cleaning implements like detailing brushes in various sizes. Small brushes with soft bristles help clean intricate areas such as air vents, dashboard crevices, and electronic interfaces. Larger brushes work effectively for wheel wells, tire treads, and exterior trim. Invest in brushes made from different materials – synthetic bristles for general cleaning, boar’s hair for delicate leather surfaces, and stiffer nylon brushes for tough grime removal.
According to Detail Lab, professional detailers recommend additional critical tools for comprehensive vehicle maintenance:
- Vacuum cleaner with multiple attachments
- Pressure washer for exterior cleaning
- Steam cleaner for deep interior sanitization
- Air compressor for hard-to-reach areas
- Extractor for deep carpet and upholstery cleaning
Choosing quality cleaning agents is equally important. Select pH-neutral automotive shampoos, specialized surface cleaners for different materials like leather, vinyl, and plastic, and protective coatings that maintain your vehicle’s finish. Professional-grade chemicals ensure you’re not just cleaning, but preserving your vehicle’s aesthetic and functional integrity.
Remember, the goal isn’t just cleaning – it’s creating a systematically maintained vehicle that performs at its peak. Each tool and cleaning agent in your arsenal represents an investment in your automotive passion and performance.
Below is a table summarizing the essential car detailing tools and their primary purposes. Use this as a reference checklist to ensure you have the right equipment before starting your detailing process.
| Tool/Material | Purpose/Use |
|---|---|
| Microfiber towels | Scratch-free wiping, drying, and cleaning various surfaces |
| Detailing brushes (various) | Cleaning tight spaces, vents, crevices, wheels, and trim |
| Vacuum cleaner w/ attachments | Removing dirt and debris from interior surfaces |
| Pressure washer | Deep cleaning of exterior paint and wheels |
| Steam cleaner | Sanitizing interior fabrics and surfaces |
| Air compressor | Blowing out debris from hard-to-reach areas |
| Carpet/Upholstery extractor | Deep cleaning carpets, floor mats, and seat fabrics |
| pH-neutral automotive shampoo | Safe, effective cleaning of exterior paint |
| Specialized surface cleaners | Targeted cleaning for leather, vinyl, and plastic |
| Protective coatings/wax | Long-lasting paint and surface protection |
Step 2: Prepare Your Vehicle’s Interior and Exterior
Preparing your vehicle for a comprehensive detail requires strategic planning and systematic approach. Professional automotive tuners understand that successful detailing begins with thorough preparation, setting the stage for exceptional results. This critical step transforms your vehicle from a standard machine to a precision-engineered masterpiece.
Start by relocating your vehicle to a well-lit, shaded area with consistent temperature and minimal wind. Direct sunlight can cause cleaning products to dry prematurely, creating streaks and potentially damaging surfaces. Temperature and lighting control are fundamental to achieving a professional-grade finish. Remove all personal items, floor mats, and loose objects from the interior, creating a clean workspace that allows unrestricted access to every surface.
Begin interior preparation by conducting a comprehensive debris removal process. Use a powerful vacuum with multiple attachments to extract dirt from carpets, seat crevices, dashboard corners, and trunk areas. Pay special attention to hard-to-reach zones like air conditioning vents, between seats, and underneath pedals. Systematic vacuuming prevents scratching surfaces during subsequent cleaning stages and provides a clear view of areas requiring focused treatment.
According to Environmental Protection Guidelines, eco-conscious detailing involves strategic waste management and chemical selection:
- Use reusable microfiber cloths instead of disposable materials
- Select pH-neutral cleaning agents
- Contain and properly dispose of used cleaning solutions
- Prevent chemical runoff into environmental systems
For exterior preparation, conduct a preliminary visual inspection identifying paint imperfections, minor scratches, and surface contaminants. Examine your vehicle under consistent lighting, rotating around the entire vehicle to detect subtle irregularities. This assessment helps determine the specific cleaning and correction techniques required. Remove surface debris using a gentle microfiber cloth, avoiding potential scratching by preventing dirt from dragging across the paint.
Before applying any cleaning solutions, rinse the entire vehicle thoroughly with clean water. This initial rinse removes loose dirt and prevents potential scratching during subsequent washing stages. Your goal is creating a pristine canvas that allows professional-grade detailing techniques to truly transform your vehicle’s appearance and protect its underlying surfaces.
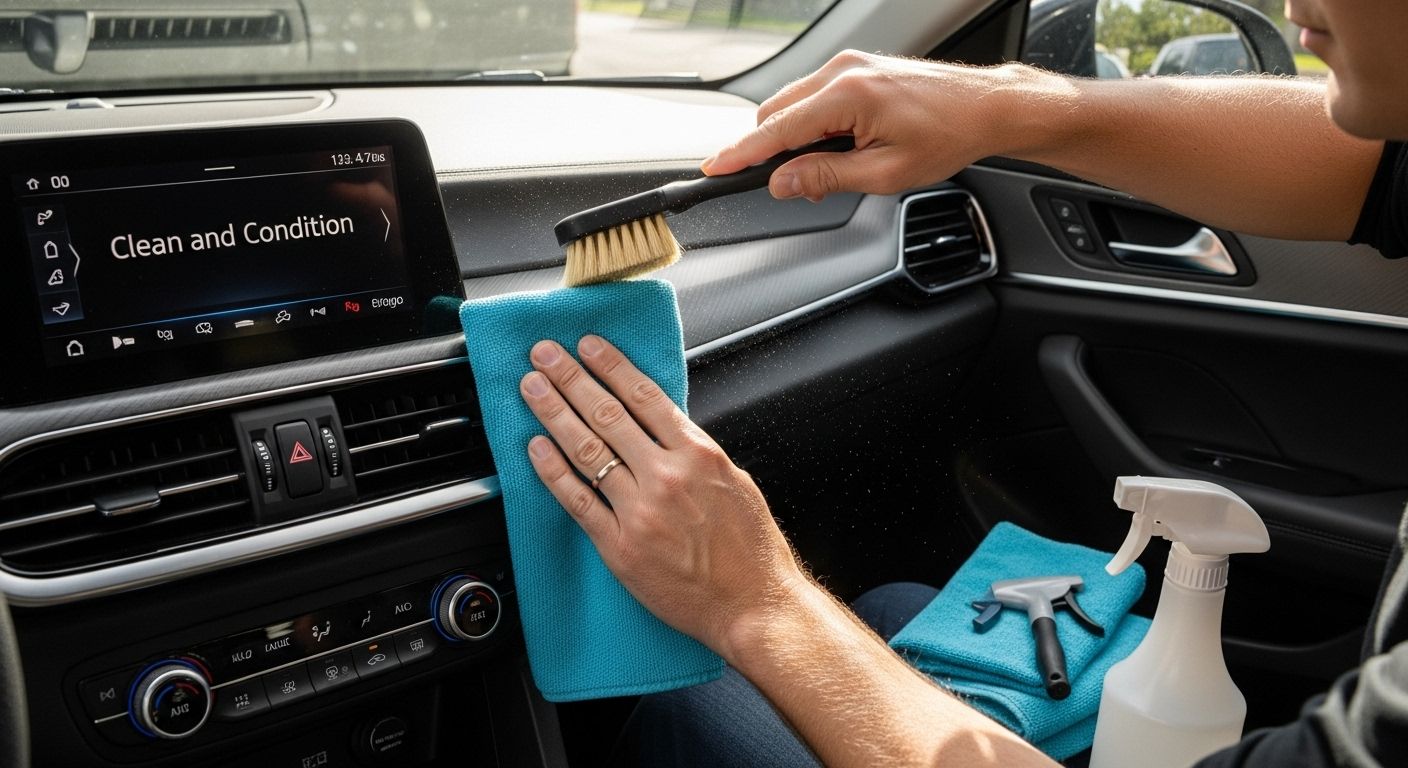
Step 3: Clean and Condition All Surfaces
Cleaning and conditioning vehicle surfaces requires precision, strategic technique, and specialized knowledge that transforms basic maintenance into professional-grade detailing. Professional automotive enthusiasts understand that each surface demands unique treatment, with careful consideration of material composition and potential chemical interactions.
Begin interior surface cleaning by selecting surface-specific cleaning agents that match each material type. Leather surfaces require specialized leather cleaners that both clean and condition, preventing cracking and maintaining suppleness. For vinyl and plastic surfaces, use pH-neutral cleaners that remove dirt without causing discoloration or degradation. Microfiber towels are critical – use different cloths for different surfaces to prevent cross-contamination and potential scratching.
Work systematically from top to bottom, starting with dashboard and console areas. Use soft-bristled detailing brushes to access tight spaces around buttons, vents, and electronic interfaces. Compressed air can help dislodge dust from intricate areas before wiping with microfiber cloths. Pay special attention to frequently touched surfaces like steering wheels, gear shifts, and control panels, which accumulate significant skin oils and grime.
According to Environmental Protection Guidelines, eco-conscious detailing involves strategic chemical management:
- Use biodegradable cleaning solutions
- Minimize chemical waste
- Select products with low environmental impact
- Prevent runoff into drainage systems
For exterior surfaces, employ a systematic approach that preserves paint integrity.
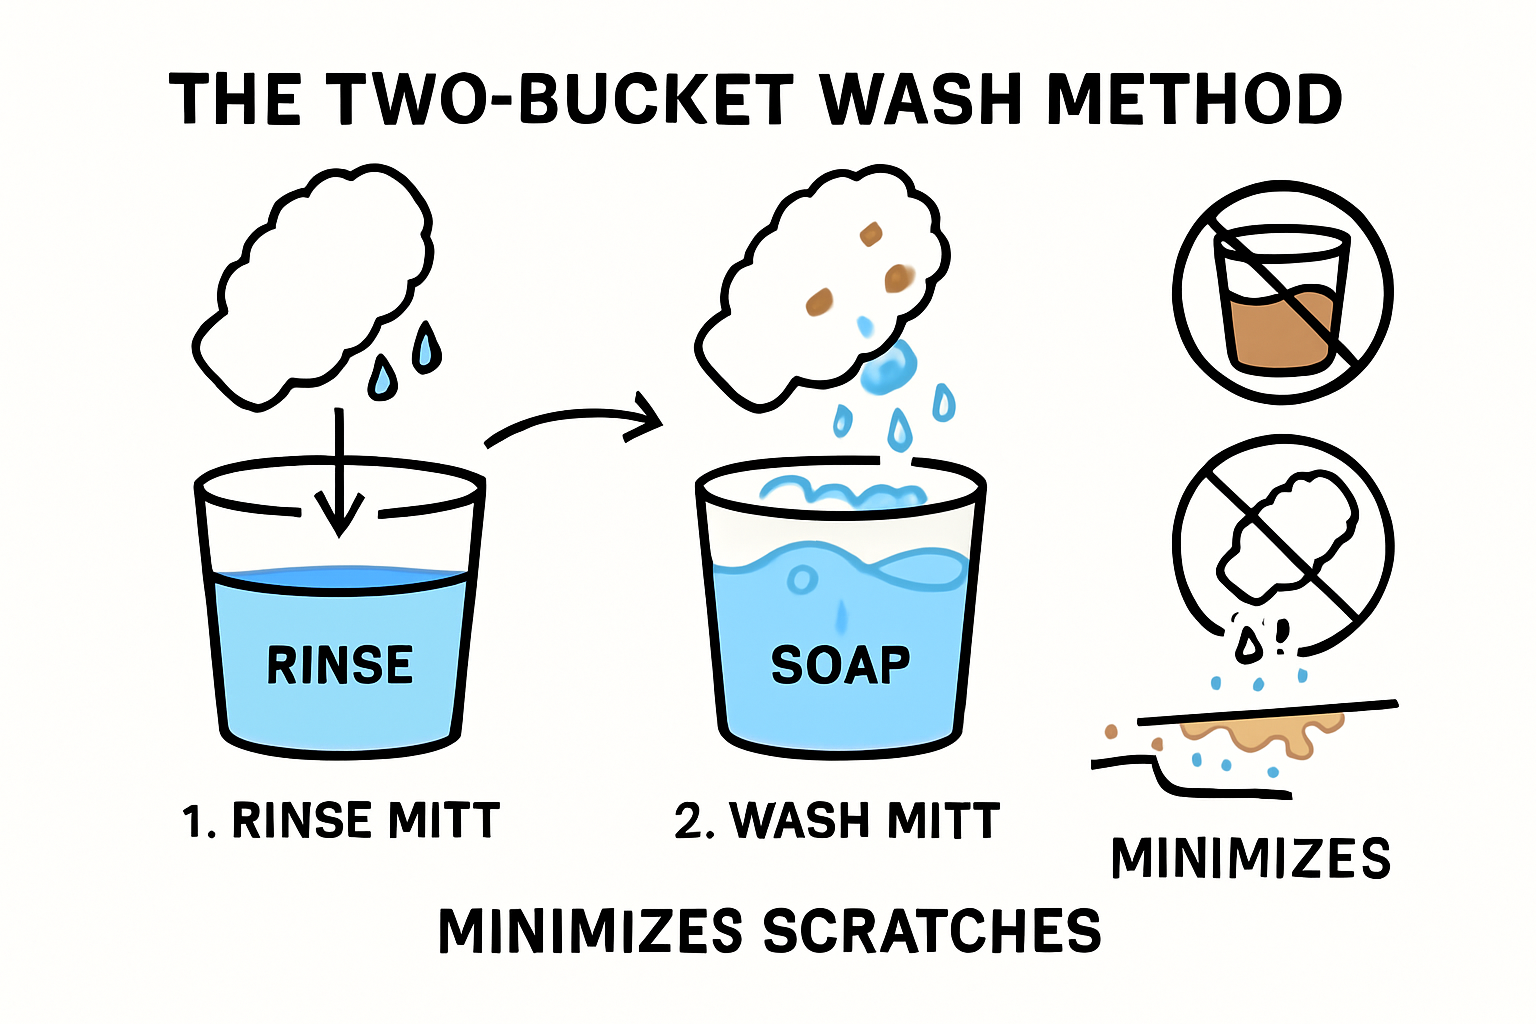
Start with a two-bucket washing method – one bucket for clean soapy water, another for rinsing – to prevent dirt redepositing on the vehicle. Use microfiber wash mitts with gentle, circular motions, working in small sections to ensure thorough cleaning without creating swirl marks. After washing, use a clay bar to remove embedded contaminants, creating a smooth surface preparatory to potential polishing or waxing.
Finish by carefully drying all surfaces using clean microfiber towels, preventing water spot formation. Your goal is not just cleanliness, but creating a protective barrier that maintains your vehicle’s aesthetic and functional excellence. Each carefully executed step transforms your vehicle from merely clean to professionally detailed.
Step 4: Polish and Protect Paint with Quality Products
Polishing and protecting your vehicle’s paint represents the pinnacle of automotive detailing, transforming a clean surface into a showroom-quality finish. Professional automotive enthusiasts understand that this step is not merely cosmetic but a critical preservation technique that protects your vehicle’s most vulnerable exterior layer.
Paint correction begins with meticulous surface evaluation, examining the paint’s condition under consistent lighting. Look for swirl marks, light scratches, oxidation, and paint imperfections that compromise the finish’s clarity and depth. Select a dual-action polisher with variable speed settings, which provides controlled, consistent motion that prevents potential paint damage. Different pad types – foam, microfiber, and wool – serve specific correction needs, allowing targeted approach to various paint imperfections.
Choose polishing compounds strategically, matching their cutting power to your specific paint condition. Start with the least aggressive compound, progressively moving to more intensive products if initial attempts do not achieve desired results. Aggressive compounds remove microscopic layers of clear coat, so precision is paramount. Apply product sparingly, working in small sections with controlled, overlapping motions. Maintain consistent pressure and speed, allowing the polisher to do the work without forcing additional friction.
According to Automotive Care Guidelines, professional detailing involves systematic protection strategies:
- Use high-quality microfiber towels for application
- Select pH-balanced polishing compounds
- Work in controlled environmental conditions
- Apply thin, even layers of protective products
- Allow proper curing time between application stages
After polishing, apply a ceramic coating or high-quality automotive wax to seal and protect the restored paint surface. Ceramic coatings provide longer-lasting protection, creating a hydrophobic barrier that repels water, dirt, and environmental contaminants. For those seeking maximum protection, multiple thin layers provide superior coverage compared to single thick applications.
Finish by performing a final inspection under different lighting conditions, ensuring uniform reflection and depth. Your goal transcends aesthetic appeal – you’re creating a protective barrier that preserves your vehicle’s finish against environmental degradation, maintaining its value and visual excellence.
Step 5: Final Inspection and Quality Check
The final inspection represents the critical moment where professional detailing transforms from technical process to artistic achievement. This step separates amateur cleaning from true automotive refinement, requiring a systematic and meticulous approach that evaluates every surface with professional precision.
Lighting is your most critical diagnostic tool during final inspection. Move your vehicle into natural, consistent lighting – preferably indirect sunlight or a well-lit garage with neutral-toned walls. This environment reveals subtle imperfections invisible under standard conditions. Rotate around the vehicle slowly, examining surfaces from multiple angles. Professional detailers recommend using both direct and oblique lighting techniques to detect remaining swirl marks, light scratches, or uneven polishing results.
Begin your comprehensive inspection systematically, starting from the vehicle’s roof and working downward. Check paint reflection consistency, ensuring uniform gloss and depth across all panels. Use a clean microfiber towel to gently wipe surfaces, identifying any remaining contaminants or areas requiring additional attention. Pay special attention to edges, corners, and hard-to-reach zones where detailing processes might have missed subtle imperfections.
Consider these critical inspection points during your final quality assessment:
- Verify uniform paint reflection across all surfaces
- Check for remaining water spots or chemical residue
- Examine interior surfaces for consistent cleaning
- Test glass clarity and streak-free finish
- Confirm no leftover cleaning product residue
Interior evaluation requires equally meticulous examination. Use a bright flashlight to illuminate dashboard surfaces, checking for missed dust in vents, around buttons, and in console crevices. Run your hand across surfaces to feel for any remaining grime or uneven cleaning. Test all electronic interfaces, ensuring no moisture or cleaning product has compromised their functionality.
Final verification involves a comprehensive sensory assessment. Run your hand across surfaces, feeling for smoothness and consistency. Visually inspect from multiple distances and angles. Your goal transcends mere cleanliness – you’re creating a precision-engineered presentation that reflects professional-grade automotive care. A truly successful detail reveals itself through seamless, uniform surfaces that showcase your meticulous attention to every microscopic detail.
Here is a checklist table to help guide your final inspection and ensure you don’t miss any critical areas during the quality check phase of car detailing. Review each item before considering your job complete.
| Inspection Area | What to Check For | Completion (Y/N) |
|---|---|---|
| Paint surface | Uniform reflection, no swirl marks or residue | |
| Water spots/chemical residue | Absence of residue or spotting | |
| Interior surfaces | Consistent cleaning, no remaining dust or grime | |
| Glass | Streak-free, clear visibility | |
| Buttons/vents/crevices | Dust-free, no trapped debris | |
| Edges/corners/hard-to-reach zones | Even cleaning, no missed spots | |
| Electronic interfaces | Clean, dry, and fully functional | |
| Surface feel | Smoothness, no leftover contaminants |
Unlock True Vehicle Brilliance – Go Beyond Appearance
You have just mastered every step to achieve a pristine car finish at home, from collecting professional detailing supplies to polishing until your paintwork glows. But perfecting your car’s exterior is only the beginning. The way your vehicle performs beneath the surface also matters. True automotive excellence combines head-turning looks with peak engine performance. If you are passionate about precision, why stop at detailing? Your next step is unlocking advanced vehicle control through expertly managed ECU files and performance tuning. For every enthusiast who wants their pride and joy to shine on the outside and run flawlessly on the inside, ECUFlashFiles.com provides a world of possibilities.

Elevate your car care from the surface all the way to the core. Whether you need original factory ECU files, crave tailored tuning solutions, or want to safeguard your upgrades with verified DAMOS data, our platform supports your journey with security, expertise, and instant delivery. This is where professional detailing meets next-level performance. Take control of your vehicle’s destiny today at ECUFlashFiles.com and experience the synergy of perfect looks and optimal power.
Frequently Asked Questions
What supplies do I need for effective car detailing at home?
To achieve professional-grade car detailing at home, gather essential supplies such as microfiber towels, detailing brushes, a vacuum cleaner, a pressure washer, a steam cleaner, quality cleaning agents, and protective coatings. Each tool plays a crucial role in ensuring thorough cleaning and maintenance of your vehicle.
How do I prepare my vehicle’s interior for detailing?
Begin by removing all personal items and floor mats from the vehicle. Then, vacuum the interior thoroughly, paying special attention to hard-to-reach areas like air vents and under seats. Ensure your workspace is clean and organized to facilitate effective detailing.
What is the best method for washing a car to avoid scratches?
Utilize the two-bucket wash method: one bucket for soapy water and another for rinsing. This method helps prevent dirt from reapplying onto the car surface. Use microfiber wash mitts and gentle, circular motions to clean the paint without causing scratches or swirl marks.
How do I choose the right polish for my vehicle’s paint?
Select a polishing compound based on the specific condition of your paint. Start with the least aggressive compound that will address your needs. Use a dual-action polisher for even application. Remember to apply compounds sparingly and work in controlled sections for the best results.
Recommended
- ECU Tuning for Beginners: Essential Guide for 2025 – Ecu flash files
- Title: Diesel Particulate Filter (DPF) Explained: Common Problems, Solutions, and ECU Tuning Options – Ecu flash files
- ECU Tuned File | stage 1 | VW Trend Bosch ME7.5.30 0261S06640 032906032DG
- ECU Tuned File | stage 1 | VW Vento Bosch BOSCH ME17.5 0261S04612 07K906055AB